After a long-time, Debian upgraded their overall OS and for some reason phpMyAdmin is not there in Debian 10 (Buster) release. Maybe they have removed it this time from apt list to keep everything as clean as possible. However, we can install phpMyAdmin on Debian 10 from the source, and it is kinda easy too. In this article, we will see how we can install and configure phpMyAdmin on Debian 10 Buster step by step.
If you don’t know what is phpMyAdmin, it is a free (open source) web software built on PHP for managing MySQL and MariaDB database servers. It is used by developers and database administrators to interact with the database server. The phpMyAdmin app offers a user interface on which anyone can manage databases.
Let’s get started and follow the steps to install phpMyAdmin on Debian 10…
Just make sure you are logged in as a root user or a root privileged user. Otherwise, you’ll need to add sudo directive every time before using any command.
Step #1. Install the LEMP Stack.
Refer this article: How to Install LEMP on Debian 10?
Step #2. Install and Configure phpMyAdmin.
Here all we need to do is grab an installation file from the source and set it up.
You can go to phpMyAdmin’s download section to fetch the latest software link.
In my case, it is phpMyAdmin 4.9.0.1 so I am going to use that version of it.
I’m going to set it up on /var/www/html location. You can use any location; there is no restriction, just use the same path everywhere ahead including Nginx’s config file.
Use one line of command at a time. It is good to see what is happening actually.
cd /usr/share/sudo mkdir phpmyadmincd phpmyadmin/wget https://files.phpmyadmin.net/phpMyAdmin/4.9.0.1/phpMyAdmin-4.9.0.1-english.zipsudo apt install zip unzip -ysudo unzip phpMyAdmin-4.9.0.1-english.zipcd phpMyAdmin-4.9.0.1-english/sudo mv * /usr/share/phpmyadmincd ..sudo rm phpMyAdmin-4.9.0.1-english.zipsudo rm -rf phpMyAdmin-4.9.0.1-english/The phpMyAdmin uses a temporary folder to cache a few things. So we need to create a tmp folder and allow it all the permissions. Just run below commands.
sudo mkdir tmp
sudo chmod 777 tmp/
Now we have phpMyAdmin files at the place. All we need to do is configure it to work.
sudo mv config.sample.inc.php config.inc.phpNow we need to edit some of the lines in the config file.
sudo nano config.inc.phpBe careful here, and read twice while doing anything.
Add blowfish secret key to secure the sessions.
$cfg['blowfish_secret'] = ''; /* COOKIE AUTH */
To generate your one click here and copy the auto-generated blowfish_secret.
Now add that key to the config file like mentioned below.
$cfg['blowfish_secret'] = 'AbCdEfGh12345678IJKL1234MNOP5678';Note: Do not copy our secret key, it is just for demonstration and weak.
Now scroll down to the phpMyAdmin configuration storage settings below that under User used to manipulate with storage just uncomment control user and pass.
/* User used to manipulate with storage */
// $cfg['Servers'][$i]['controlhost'] = '';
// $cfg['Servers'][$i]['controlport'] = '';
$cfg['Servers'][$i]['controluser'] = 'pma';
$cfg['Servers'][$i]['controlpass'] = 'pmapass';
Let the user as it is but change the pmapass to a strong password. This password will be used ahead while creating pma user for phpmyadmin database.
Now scroll below to Storage database and tables and uncomment full storage database and tables section.
/* Storage database and tables */
$cfg['Servers'][$i]['pmadb'] = 'phpmyadmin';
$cfg['Servers'][$i]['bookmarktable'] = 'pma__bookmark';
$cfg['Servers'][$i]['relation'] = 'pma__relation';
$cfg['Servers'][$i]['table_info'] = 'pma__table_info';
$cfg['Servers'][$i]['table_coords'] = 'pma__table_coords';
$cfg['Servers'][$i]['pdf_pages'] = 'pma__pdf_pages';
$cfg['Servers'][$i]['column_info'] = 'pma__column_info';
$cfg['Servers'][$i]['history'] = 'pma__history';
$cfg['Servers'][$i]['table_uiprefs'] = 'pma__table_uiprefs';
$cfg['Servers'][$i]['tracking'] = 'pma__tracking';
$cfg['Servers'][$i]['userconfig'] = 'pma__userconfig';
$cfg['Servers'][$i]['recent'] = 'pma__recent';
$cfg['Servers'][$i]['favorite'] = 'pma__favorite';
$cfg['Servers'][$i]['users'] = 'pma__users';
$cfg['Servers'][$i]['usergroups'] = 'pma__usergroups';
$cfg['Servers'][$i]['navigationhiding'] = 'pma__navigationhiding';
$cfg['Servers'][$i]['savedsearches'] = 'pma__savedsearches';
$cfg['Servers'][$i]['central_columns'] = 'pma__central_columns';
$cfg['Servers'][$i]['designer_settings'] = 'pma__designer_settings';
$cfg['Servers'][$i]['export_templates'] = 'pma__export_templates';
These tables don’t yet exist in the database, but we will create them shortly.
Now all the configurations are made. Save it by Ctrl+O and exit nano editor by Ctrl+X.
Next, we’ll need to create the phpMyAdmin storage database and tables. By the following command, we can use the create_tables.sql file located under the sql folder to create the configuration storage database and tables:
mariadb < sql/create_tables.sqlThis will create a phpmyadmin database and create the required tables for storage uses.
Next, we need to create a pma user and grand it the necessary permissions.
mariadbGRANT SELECT, INSERT, UPDATE, DELETE ON phpmyadmin.* TO 'pma'@'localhost' IDENTIFIED BY 'pmapass';exitChange the ‘pmapass’ with the desired password and remember it. You’ll need this to authorize PHPMyAdmin to use and manage MySQL databases.
Step #3: Configure NGINX for phpMyAdmin.
Now let’s configure Nginx to enable phpMyAdmin on Port 80, which will be the frontend.
sudo nano /etc/nginx/sites-available/defaultYou can configure settings here as you want to. Just for this tutorial, I am going to configure it to access it on a direct IP address of the server.
server {
    listen 80;
    listen [::]:80;
    root /usr/share/phpmyadmin;
    index index.php;
    server_name _;
    location / {
        try_files $uri $uri/ /index.php?$args;
    }
    location ~ .php$ {
        try_files $uri =404;
        fastcgi_pass unix:/run/php/php7.4-fpm.sock;
        include fastcgi_params;
        fastcgi_param SCRIPT_FILENAME $document_root$fastcgi_script_name;
    }
}
Just copy the above-mentioned configs to the default file and save it. Save it by Ctrl+O and exit nano editor by Ctrl+X. You can play with the configs as you want, like change the port 80 to something else for security reasons or HTTP authenticate the access and more.
Now restart the Nginx services once in order to fetch new commands in action.
sudo systemctl restart nginxEverything is done now. You have a full-fledged working phpMyAdmin on Debian 10.
To access it, based on our setup, open the browser and enter the IP address of the server.
Like: http://server-IP-address
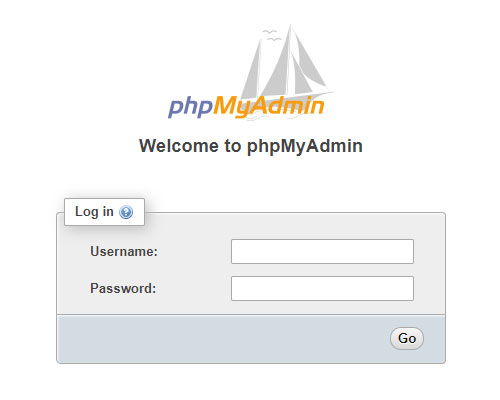
Boom, if everything is right, we will see a phpMyAdmin login page.
Just login with the newly created username and usersecret which we have created above.
If you do not remember which username and password to use here, remember that we used in the earlier article “How to Install LEMP on Debian 10?” to replace the disabled root user.
Related Tutorials:
Leave a Reply